2.28.2010

Brother and Sister, not so rascally when they're made out of paper


Front View

Well, I can't believe it's been three weeks since my last post, I've been trying to stay on top of all my networking outlets and boy I'm slacking. I have one friend who likes to make fun of me having to update on flickr, and my blog and facebook and my etsy shop; but she's right - I'm trying to get Quilly Nilly out there and it's like a second job.

With that said.....I finished my paper quilled Brother and Sister 3-D miniatures. The last post talked you through and had images of the process to make the girl; well once I had her done and on her grassy knoll my son wanted to know if I could make a boy. I honestly was not sure I could do it, but I love competition (even if it's with myself) so I set out to try and I did it and he's cute. I glued him to his grassy knoll but because they're brother and sister I wanted them together so I combined them and I'm very happy with it.


Back View (so cute)

I'm going to offer these through my etsy shop probably as a custom order till I can get time to make some, which I hope to have in March (wishful thinking). Thanks for looking and have a fabulous evening.

Side View

2.10.2010

Little Miss Adrianna

I was on etsy yesterday just browsing through shops, my coworker and I were talking about little dolls and she told me I needed to do one out of paper, I must admit in the past I've contemplated this but was afraid to try - there are some quillers out there who do the most gorgeous miniatures and I didn't know where to start. Over the past year or so I've learned a few techniques and the idea of a miniature doll didn't seem so far off, so around 9 pm last night I told my husband I was going into my computer/craft room and I wasn't coming out until I had something.....well, 3 1/2 hours later I was done, little miss adrianna was complete - I still have to create her stand but that will be tonight or tomorrow and I'll post that photo then.

I took photo's as I went, something I've never done but I wanted to share with everyone my work process.
Here are the steps it took for me to create my paper doll.

Step 1 - sketch out what I want it to look like , look at that cutie


Step 2 - Create head and add hair


Step 3 - Once hair is complete, make neck and shoulder area (not shown) to hold up dress


Step 4 - Cut out dress from scrapbook paper, glue on to shoulder area


Step 5 - Once dress is on, create legs and shoes
At this point it was getting late so I guess I wasn't thinking about taking photo's I then created the sleeves and little hands, painted the legs and face - added a bow and she was complete, tonight I will create her stand


Final Side View


Final Front View - not bad for my first doll and too cute if I do say so myself

My son wants to know if I can make little boys so that will be next, not sure about those; but I definitely look forward to expanding on my paper dolls.

1.18.2010

New Wedding Cake Card Flavors

I was fortunate enough this weekend to attend a crop at the local scrapbook store Eclectica, and one of the items I worked on was a new wedding cake card - I wanted to do one in chocolate and I was very pleased with the way it turned out. After finishing that card I worked on two more at home and they are now available for order. I actually timed myself on these cards because I had no idea how long they took to make, I thought maybe 30 - 45 minutes; I was way off - almost an hour and a half for one card - they are so pretty, worth all the time put into them. I can't wait for someone I know to either get married or have an anniversary so I can create one for them.

Chocolate Almond


Plum Delight


Rose Parfait

1.10.2010

Getting Ready for Valentine's Day - Already

I say already like I'm working on these items and it's December or something, well at least Valentine's Day is still over a month away, so there is still time to buy your loved one's something unique and handmade from me. I've added a mini frame and a couple owl card/magnet combo's to my etsy shop, please feel free to go check them out; I've also been getting stuff done for my space here in town at Creativity in Bartlett; so I've been busy and enjoying working on something other than snowflakes.

Here are some of my new items (that can be found in Creativity) or you can contact me and I can create something just as original for you - in addition to the matchstick notepads I have mini frames and a double photo holder - I've gotten back into making roses and I miss them; these turned out so pretty I want to keep them or least make a set for me.


Mini Rose Frame


Mini 3 Heart and Text Frame


Rose Wood Double Photo Holder

1.04.2010

Happy 2010!

Wow, it's almost the fifth day of the new year and I'm just now wishing everyone a Happy New Year; I can see things haven't completely changed; I'm still a smidge late on things. Perhaps that should be one of my new year's resolutions, try to be on time; I hate watching time so I just don't see it happening.

I started out the year on a creative high you could say. I attended a crop at the locally owned scrapbook shop in my area and was very productive. I finished 20 cute little valentine matchbooks, each with 12 sheets of paper, cut by me. The front of each matchbook has a tiny scalloped edge with a little bit of glitter ( I love glitter! ) and a quilled heart. These are samples that will be part of the January 2010 Valentine Themed Boxes at Sampler Village, go check them out and see what it's all about.


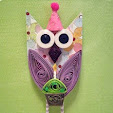
After finishing these up I started on Valentine cards with owl magnets attached; they're a card and a gift all in one; perfect to give to your favorite Valentine this year. The owl magnet fits perfectly in a hole on the front of the layered card, once the owl is removed there's a little secret behind there, too cute! I hope everyone is having a fabulous 2010 so far, I think this is going to be a good year.

12.21.2009

In Love With Magnets

I've always loved magnets, but lately for some reason I keep coming back to magnets when I'm trying to think up something new to create. My coworker came over this weekend with his kiddo's to exchange Christmas gifts with my children and for his 9 year old daughter I created a magnetic board - my second one ever to create and I thought it turned out adorable. Bright contrasting colors which will go perfectly with her lime green and hot pink room.


Close up of Magnet Board


The other was a round cross magnet, the base being paper mache which I've painted ivory; I then covered the front with striped paper and using an ivory colored chalk I dabbed over it to lighten it so the quilled cross would pop more. Very pretty.

Close up of Cross Magnet

12.09.2009

Happy December!

I've been out of it for a bit, I was in the Christmas in Bartlett craft festival and I've been busy ever since trying to finish up some custom orders. One order was for a nice woman that wanted a business card holder, her business card has bright colored circles and she wanted to have the same on her holder but also wanted it a chocolate brown color - I think it turned out too cute. Another order was for personalized magnets, I'm showing just one of them here; I liked them so much I'm offering them in my etsy shop - who wouldn't love a magnet with their name on it done in such a swirly twirly original way, I love it! Perfect stocking stuffer. I'm thinking I may also make some a little larger with inspirational words....new stuff coming soon.

Circle Business Card Holder


Personalized Quilled Magnet
 

blogger templates | Make Money Online