12.29.2011

Roses, Strawberries and Cupcakes

Can you believe it's already December 29th, creatively; I'm looking forward to 2012. I've made a list of new items I'd like to make and have already made a couple so I'm happy about that. We had a good Christmas this year, I hope everyone else had a fabulous holiday as well.

A coworker of mine requested a card for his friend's upcoming wedding. Their colors are red, black and white; and he was envisioning a heart made out of roses. I found a nice black metallic paper, which I used for the front of the card; which was then embellished with approximately 47 red roses - that took awhile to do - then I printed their names and their wedding date, scalloped it and added some glitter and it turned out just lovely. It's been added to my shop, where you can customize the text - here is an example of it with "I love you".


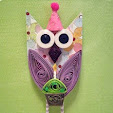
I also had planned on making more jewelry/trinket boxes this year. They're like little sculptures to me, I really enjoy working on them; and very recently I had sold a few that I had in my shop - so I thought now was as good a time as any. I first made the strawberry, then the cupcake; I still want to make one with a ladybug but haven't figured that one out yet - that will be soon though.


12.05.2011

Snowflakes

I have been sooooo busy making snowflakes. I had big plans in November to build up stock of quilled snowflakes for my Etsy shop, let's just say; it did not go as planned. The beginning of November I received an order from a company for 100 snowflakes, I was shocked. I've had people in the past question how much it would be for 100 of a card but that's as far as it would go; this time she kept writing back so it actually materialized. I was excited for the opportunity but I was also a tad worried; not that I wouldn't get it done - I didn't have a choice actually, it had to get done; I called it Operation Blizzard and I only had 2 1/2 weeks to get them done, I did it and the customer was absolutely thrilled with them.


On top of finishing up those 100 snowflakes, I also had to finish my coworkers order of 20 flakes; I had 10 to go - I just finished them this weekend. These are a new design, they're an inch larger then the one's in my shop, they're done using gold edged papers and they have a window in the middle that simulates frosted glass; you can see in the photo how the lights on the tree shine through.


I do love the look of my snowflakes but I'm very much looking forward to creating some new designs for Valentine's Day; which I will be starting within the next couple weeks.

10.22.2011

Quilling Class

Earlier today at the local independently owned scrapbook store, Eclectica; I taught a quilling class. What fun! I thought I would be nervous but I really wasn't. I was concerned that I wouldn't be able to explain it in a way that they would understand but they all said I did great, woo hoo. We created a quilled flower for a tag, a snowflake for a card and a pumpkin as an embellishment. I brought in some items that I've made to show what can be done with quilling and we've decided for the next class I'm going to teach fringed flowers and roses - that may be a little tricky, I can make roses but not sure how I'll explain it; that class will be in January of the new year so it gives me plenty of time to figure it out.


10.21.2011

Sneak Peak: Cardinal Ornament

I've had a little time to work on some new items, one being a cardinal ornament. Awhile back I had drawn sketches of a bird in a nest with Christmas lights and was able to finish it yesterday. I've also thought I would create a blue bird in a nest and will most likely sell them as a set. This little cutie is about 1 1/2" long and 1" tall. Coming to my etsy shop soon.

10.16.2011

Paper Doll Princess

In October at my favorite local scrapbook store, Eclectica; they have what they call a "Scrap Pink" crop, where some of the money goes to help in the fight against breast cancer. Yesterday was the crop, 10 hours of awesome craftiness with a fabulous group of gals; Olive Garden and some door prizes; we all had a great time. They also do a contest where you get to decorate a die cut paper doll and everyone votes on their favorite, I love this contest; it's so much fun and I win it; or at least the last 3 times I entered I won. For my doll yesterday I decided on a princess. I used white swiss dot card stock to create her dress, added bling using my Star Dust Stickles, and created her tiara, jewels, and hair with quilling. I/she won, super exciting; got me a $5 gift card which I used last night purchasing some new paper (which I didn't need) but who doesn't love more paper.

10.14.2011

New Projects

I'm so behind on posts, it's awful; when my allergies bother me I just don't do any quilling - the past week or so I've been feeling a little better so I worked on some custom orders. The first project was a set of 4 butterfly magnets, the second was a "lovey" card. For the magnets, I decided to use more than one color for the wings, I chose teal as my main color and accentuated each with purples/blues or yellow/oranges/light green.

On the card it was pretty open, I told him I was thinking of a tree with their initials and in the leaves I would add a few hearts; he said it sounded good to him and loved the way it turned out. If you'd like your own Love Tree card with customizable initials feel free to pop on over to my shop and purchase it. I've also added a set of 2 butterfly magnets to my shop, which would make a great teacher gift or office gift as the holiday's approach.


9.22.2011

The Letter M

I'm just finishing up a custom order for a letter "M". I was asked to use pale blue, gray and ivory for the colors, I purchased those colors in bazzill card stock and also a blue that was a smidge darker than the pale blue. Her walls are ivory so I chose the pale blue for the actual M shape and decided to accent it with the other colors. She wanted it to be 12" tall, on the computer I took the M she chose and did a loose sketch of what I thought it would look like. Once I had the right hand side completed (before glueing anything down), I sent her a photo to make sure I was going in the right direction. Once I received approval I continued to finish up the entire piece, going back and forth between the darker blue and the gray and ivory. I happened to have a pale blue sheer ribbon in the width that I wanted (1/2" ish) to hang it by; now all I have to do is create two tabs to go on the back from which the ribbon will attach. I can't wait to hear how she likes it.
 

blogger templates | Make Money Online